|
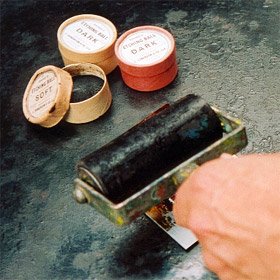
The inspiration for each of my prints stems from a combination of my observations, sketches, watercolour studies and photographs. A zinc plate is totally covered with an acid-resistant substance called 'hard ground'. When this is cut through, with an etching tool, the underlying metal is exposed. The design, thus produced, is then etched into the metal by immersing the plate in acid. I outline the design, in reverse, onto the plate. Lines and textures are made by wielding the etching needle like a pencil, for fine lines, or by using the needle's blunt end to create coarser textures. The plate is then immersed in dilute nitric acid in stages that vary from one to forty-five minutes. The parts I wish to print finely can be 'stopped out' with varnish early in the process. In other areas the acid is allowed to etch deeper so that the grooves thus created will hold more ink and will therefore print more darkly. At each stage of making the plate I take a print to see how it is developing. To do this the clean plate is warmed and black ink rubbed in all over it. Surplus ink is wiped off with a pad of 'scrim'. The edges are then cleaned and finally the plate is hand wiped. Sometimes I clean an area with tissue, or apply whiting to that area, to produce a strong white contrast. The plate is then placed on tissue paper on the bed of the press. Dampened paper is placed over it, then more tissue and finally the press blankets. It is then taken through the press; a process that transfers the reversed image from the plate to the paper. Sometimes I apply a 'soft ground' which allows textures, like lace or feathers, to be impressed into the ground by the press. Their images can then be etched ('bitten') by immersion in the acid. I use 'open bite' to achieve some tonal areas. An area of the plate is immersed in acid, before etching, and the acid simply lowers the exposed surface to create a pool. Only the edges or walls of the pool will hold ink. Further tonal areas are put onto the plate by giving them a 'tooth' which holds the ink. This is done by allowing aquatint resin to fall (fine aquatint) or by sprinkling (course aquatint) onto the plate. The resin is fused to the plate with heat and then 'bitten' by acid. A few minutes immersion for a light grey or up to twenty minutes for a deep black. Both line and aquatint can be softened or removed by scraping and burnishing with oil, sandpaper, pumice stone, charcoal or snake stones. When I am satisfied with the plate I then mix up a range of colours. These I apply to the plate by the 'dolly' method, dabbing and blending the colours. I take several prints, or proofs, until I am happy with the result. Editioning prints requires pre-dampened paper and the mixing up of large quantities of inks. Ten 'Artist's Proofs' are taken to establish the colour on the plate and for me to make my corrections to colouring if necessary. The edition is then printed. The re-inking, which is required between each individual print, leads to small variations in colour thus making each print unique. The prints are dried for two weeks pressed between tissue paper and boards. They are then signed and numbered. |
||||||||||||
|
www.joanhodgkiss.com Copyright © Joan Hodgkiss. All rights reserved. |
email info@joanhodgkiss.com |
|||


